


Beaufort Ink Pen Kits
In this article, we are doing a deep dive into the incredibly smart, thoughtfully engineered lineup of Beaufort Ink pen kits to show you exactly what makes them premium pen kits that you’ll love to turn.
Plus, we’ll take you step-by-step through turning the gorgeous Sirocco kit on the lathe using a stunning Blackbeard’s Bloom Diamondcast blank.
What Makes a Pen Kit Truly “Premium”?
When we talk about a premium pen kit, most people immediately think of aesthetics. While Beaufort Ink kits certainly have a striking, highly cohesive design language, the real magic is in the engineering you don’t see.
1. Ultra-Durable Plating & Coatings
Not all gold titanium or chrome platings are created equal. Budget kits often use micro-thin plating that wears away to raw brass after a few months of pocket wear. Beaufort Ink kits feature exceptionally thick plating topped with a durable epoxy coating, ensuring your hard work looks brand new for years to come.
2. Effortless, High-Quality Transmissions & Refills
You shouldn’t have to oil, clean, or “break in” a pen mechanism. Beaufort’s single-tube twist transmissions are buttery smooth straight out of the bag. Their capped pens feature rollerball refills with an incredibly smooth, easy flow (very similar to the famous Schmidt Easy Flow), and their fountain pens are equipped with premium German-made nibs.
3. Quality-of-Life Improvements for the Shop
Beaufort has solved two of the biggest headaches in pen turning:
- Every brass tube comes pre-chamfered from the factory. You don’t have to ream or chamfer them after gluing. This simple detail massively reduces the risk of splitting fragile, expensive materials like Tru-Stone or acrylic when pressing the hardware together.
- Standard pen mandrels can bow, flex, and run slightly out of round. Beaufort’s bushings are specially designed with a deep chamfer to fit a 60° cone center. Turning single tubes between centers eliminates mandrel flex, giving you a perfectly concentric pen.
- See those tiny little grooves on the bushings? Those are wear indicators. As you sand and turn dozens of pens, your bushings naturally shrink. Once those grooves wear smooth, you know it’s time to replace them before your turned blanks start running smaller than your hardware.

Meet the Beaufort Ink Lineup
Before we head to the lathe, let’s take a quick look at the unique personalities and mechanics across the Beaufort family of kits:
The Twist & Click Pens (G2 Parker Style Refills)
-
The Tempest: The ultimate modern click pen. It features a rugged, minimal design with a clean click mechanism that makes it the perfect sleek “daily carry” pocket pen. Available in gunmetal, gold, and chrome.
-
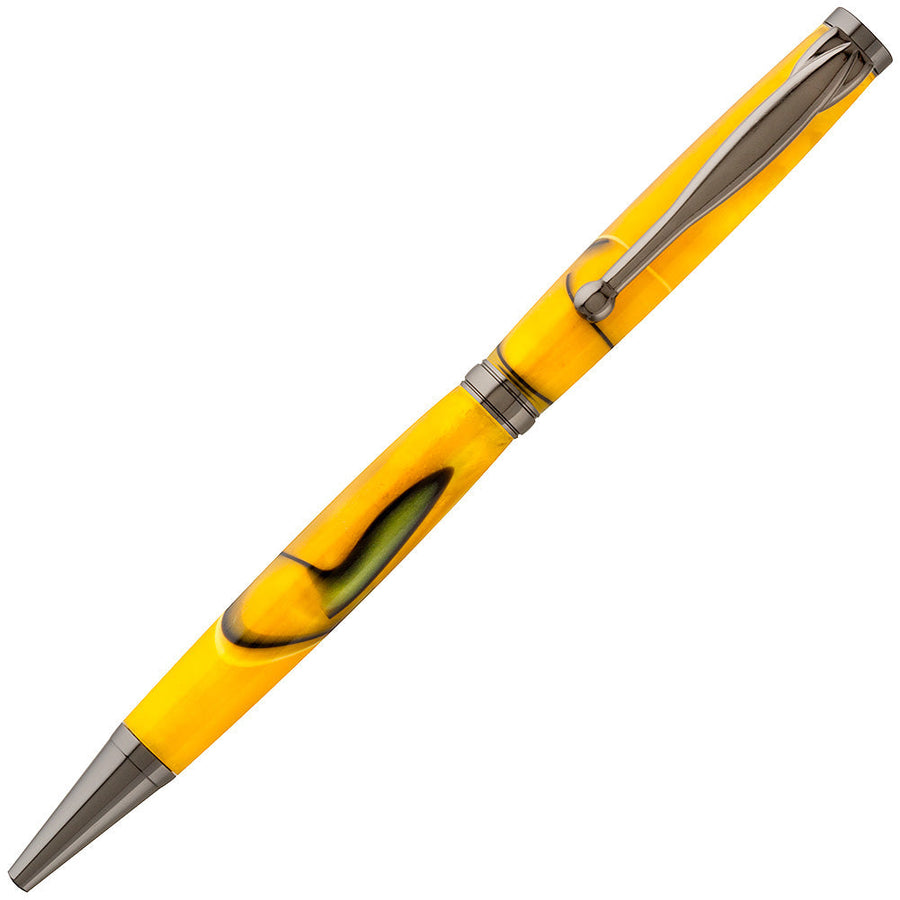
The Sirocco: A stunning twist pen defined by elegant, organic lines in an Art Nouveau style. It features high-contrast, two-tone plating options (like gold/gunmetal or chrome/gunmetal) that give you incredible creative freedom when pairing it with a blank.
-
The Headwind: A rugged, tactical twist pen featuring an aggressive diamond-pattern knurling on the hardware. It is built for a solid grip and a smooth, reliable twist mechanism.
- The Zephyr: A classic twist pen heavily inspired by the geometric aesthetics of the Art Deco era. It utilizes striking two-tone plating options to create high-end visual contrast.
The Capped Pens (Rollerball & German Bock Fountain Nibs)
-
The Cyclone: A sophisticated capped pen accented with dark, dramatic black chrome details and incredibly smooth, fast-acting triple-start threads.
-
The Laveche: A beautifully balanced capped pen featuring a sleek, modern profile and a incredibly smooth center-band coupler.
- The Mistral: The crown jewel and flagship of the Beaufort lineup. Designed for ultimate customization, the Mistral features a loose center-band ring and a blank top end-cap. This allows you to turn your own custom accent rings and custom cabochons right out of the same blank (or a contrasting material like Truestone) to create a truly one-of-a-kind bespoke writing instrument.
Step-by-Step: Turning the Sirocco Pen
Now that you know what makes these kits special, let’s head to the lathe and turn a Sirocco kit in a stunning Blackbeard’s Bloom Diamondcast blank (a beautiful resin packed with real diamond dust sparkles).
Step 1: Cutting and Drilling the Blank
Mount your square blank in a chuck (such as a VM100 with extended dovetail jaws). To prevent drilling blowout, mark your blank about 1/4” longer than your brass tube.
- Turn the lathe to 2000 RPM and use a parting tool to cut the blank to length.
- Create a small dimple in the center of the blank face using the point of a skew chisel.
- Bring your tailstock up with a 27/64” drill bit, leaving the tailstock unlocked. Gently advance the bit into the dimple until it finds its natural center, lock down the tailstock, and lower your lathe speed to 800 RPM.
- Drill slowly, backing the bit out frequently to clear plastic shavings and prevent heat buildup.
Pro-Tip: As you reach the very end of the blank, slow your feed rate down to a crawl. This prevents the drill bit from blowing out and shattering the unsupported resin fibers at the exit.
Step 2: Preparing and Gluing the Tube
Scuff the outside of your brass tube with 400-grit sandpaper to give the glue some microscopic “teeth” to grip.
- Run a swirl of thick CA glue (or epoxy if your drill hole has slight gaps) down the inside of the blank. Use Whip Tips for a convenient way to apply the glue right where you want it.
- Push and twist the tube into the blank, ensuring it is slightly recessed on both ends.
- Spray with activator for an instant cure.
- Square the ends of your blank. You can do this on the lathe by mounting the blank in your chuck and gently using your skew chisel as a negative rake scraper until you see a bright, shiny ring of brass.

Step 3: Turning Between Centers
Remove your chuck and insert a 60° cone drive center in the headstock and a revolving cone center in the tailstock. Slide your Sirocco bushings into the blank and mount it directly between the centers.
Using a razor-sharp skew chisel at 3000 RPM, begin making light shearing cuts to round the blank.
- Acrylics and resins turn beautifully when you let the tool do the work—you want to see long, continuous ribbons of plastic coming off the tool, not fine dust.
- Once you are within 1/16” of the bushings, switch your skew to a negative-rake scrape (holding the blade flat on the tool rest, parallel to the floor).
- Gently sweep left to right, creating a very subtle, elegant convex curve that blends perfectly into the diameter of the bushings.

Step 4: Sanding and Polishing
To save yourself hours of sanding out deep scratches, start with a fine grit.
- Drop your lathe speed to 1000 RPM and start with 600-grit wet/dry paper. Hold the paper in a taut strip to prevent creating waves or dips in the profile.
- Turn off the lathe and sand linearly (headstock to tailstock) to eliminate any radial swirl marks.
- Progress through non-woven abrasive pads (such as 1500 to 2500 grit), lightly misting with water if your resin is sensitive to heat.
- Apply a micro-abrasive polish (like the Micro Magic 3-step system). Use a small, folded piece of flannel and apply light pressure to generate just enough friction heat to melt the wax and polish the surface. Buff to a mirror-like finish with a clean rag.

Step 5: Assembling the Sirocco
Lay out all your components: the writing tip, the spring, the refill, the smooth twist transmission, the cap, and your gorgeous finished blank.
- Look at your blank and decide which end has the best pattern. We wanted the striking purple streak in our Diamondcast blank near the writing end.
- Line up your pocket clip so it doesn’t cover up the best features of your blank.
- Because Beaufort’s tubes are pre-chamfered, your components will start easily by hand. Press them together slowly and gently using a dedicated pen press.
- Drop in your spring and refill, screw the transmission in nice and tight, and slide on the top cap.

The Verdict
The finished Sirocco pen is a stunning, balanced daily carry. The “Blackbeard’s Bloom” blank catches the light beautifully, and the two-tone chrome and gunmetal plating pairs perfectly with the dark resin. Best of all, the action is incredibly smooth, and the writing experience is flawless.
If you are ready to stop fighting with cheap hardware and start creating heirloom-quality writing instruments, give Beaufort Ink kits a try.
Are you interested in seeing us turn a completely custom cabochon and accent band out of Tru-Stone or custom resin for the flagship Mistral kit? Let us know in the comments below!

Featured posts