



Powermatic 2014B Lathe: Complete Unboxing, Assembly Guide, and Turning Review
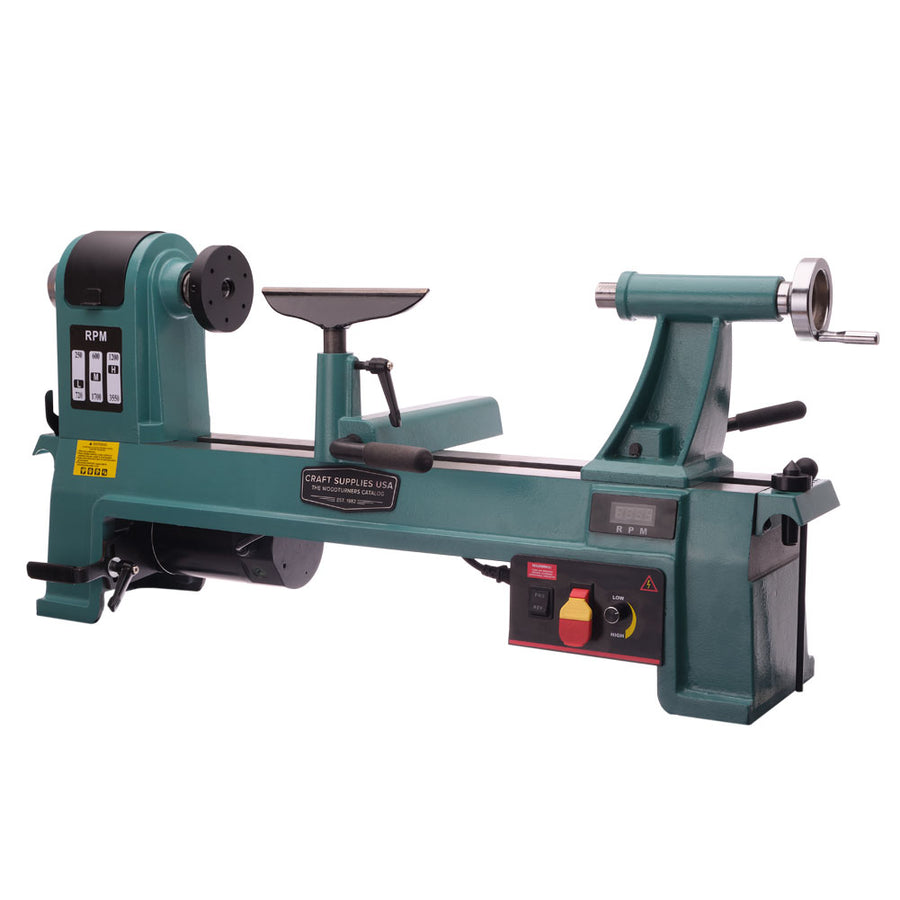
If shop space or standard 115V wall power limits what you can bring into your workspace, finding a lathe that doesn’t compromise on rigidity, capacity, and precision can be a serious challenge. The Powermatic 2014B answers that need by shrinking the proven engineering of Powermatic’s flagship 3520 series down to a compact, mid-sized footprint.
In this guide, Mike walks through everything you need to know about the 2014B: from solo-shop delivery and step-by-step assembly tips to stress-testing a 1-horsepower motor on dry hardwood and outboard turning.
Unboxing & Solo Shop Handling
When the Powermatic 2014B arrives, it ships on a pallet in two separate packages:
- Stand Box: ~85 lbs
- Lathe Box: ~212 lbs
Splitting the components makes getting the shipment into a garage or basement shop far more manageable if you do not own a pallet jack, forklift, or ceiling-mounted hoist.
Managing the Weight Alone
Tackling a 212-pound cast iron machine by yourself requires one simple trick: remove the components before lifting the bed.
- Cut the shipping straps anchoring the lathe to the pallet.
- Remove the threaded safety stops from both ends of the bedways. (Store them somewhere safe so they aren’t misplaced.)
- Loosen the headstock lock lever, lock the spindle so it won’t spin in your hands, and slide the headstock completely off the bed. Be careful not to pinch the remote controller cords.
- Slide off the banjo and tool rest.
- Slide off the tailstock.
Stripping down these assemblies cuts the main bed weight nearly in half, letting a single woodturner manage the rest of the build safely.
Step-by-Step Assembly & Stand Setup
Note on Tools: The 2014B does not include assembly Allen wrenches. Have a quality metric hex set ready, specifically 6mm and 8mm keys/sockets, plus a 3mm key for faceplate set screws.
Assembling the Splayed Legs
The stand uses flared legs designed to provide a wider, more stable footprint than previous generations.
- Mind the Left/Right Orientation: Each leg has an angled taper marked with a stamped L or R. Ensure the letter faces inward toward the lathe bed. If inverted, the stand will sit unevenly.
- Leveling Feet: Thread the leveling feet into each leg. Back the jam nuts down to leave about a 1-1/4” gap between the foot and the bottom of the leg as a baseline before fine-tuning shop level. Thread carefully—the splayed angle makes the feet appear crooked as they start.

- Height Adjustment: The leg brackets offer multiple height mounting posts. Secure the legs using the 8mm hex bolts with flat and lock washers finger-tight.
- Avoid Over-Torquing: The stand legs are formed from square steel tubing. If you wrench down too aggressively with a long Allen key, you will crush and collapse the tubing. Snug them down evenly and tighten fully only after the lathe is upright.
Mounting the Bed
- Lay a rubber mat or heavy cardboard flat on your shop floor to protect the precision-ground bedways.
- Carefully place the stripped bed casting upside down on the mat.
- Align the leg assemblies over the mounting holes on the underside of the bed.
- Fasten using the shorter 6mm hex bolts (each with a lock and flat washer). Keep them finger-tight until all four bolts per side engage cleanly, then snug them up.

- Flip the assembly upright onto its feet. With the full weight resting naturally, go through and torque down the 6mm bed bolts, the 8mm leg bolts, and the leveling feet jam nuts.
Bedway Prep and Component Reassembly
Factory machines are shipped coated in a heavy protective grease to prevent corrosion in transit. Cleaning this off properly ensures smooth movement and prevents rust down the road.
- Wipe down all bare cast iron surfaces with a clean shop rag and solvent if necessary.
- Apply a liberal coat of Mylands paste wax (or equivalent microcrystalline wax) to the bedways, front painted casting surfaces, and the underside of the tailstock and banjo. Let the solvent flash off, then buff clear.

- Keep wax and lubricants off the cylindrical cam bar underneath the banjo. Waxing the cam reduces friction, which can cause your banjo to slip under aggressive turning pressure.
- Re-mount the waxed banjo, tailstock, and headstock. Re-install the safety stops on both ends of the bedways immediately so nothing slides off accidentally.
- If the tool rest post binds inside the banjo, check the small brass set screws on the banjo casting. Factories sometimes overtighten these, preventing the tool rest from dropping freely.
Powermatic 2014B Technical Specifications
| Feature | Specification |
|---|---|
| Swing Over Bed | 14” |
| Distance Between Centers | 20” (expandable via extension) |
| Motor | 1 HP, 115V Single Phase (Runs on standard household circuits) |
| Speed Range | 3-step pulley system (up to 3,500 RPM) |
| Spindle Thread | 1-1/4” x 8 TPI |
| Taper | #2 Morse Taper (Headstock & Tailstock) |
| Tool Rest Post Diameter | 1” (Accepts full-sized aftermarket tool rests) |
| Working Centerline Height | Adjustable from 34” to 46” from floor |
| Outboard Capacity | Up to 29” diameter (with optional extension kit) |
What Makes the 2014B Unique?
1. Flagship 3520 DNA Scaled Down
Instead of cutting corners with miniature hardware, Powermatic brought several full-sized features to this model:
- Acme-Thread Tailstock Quill: Moves fast and smooth, drastically cutting down on hand-wheel turns when drilling pepper mills or deep vessels.
- 1” Tool Rest Post: Many mid-sized lathes drop to 5/8” posts, which flex and chatter. Keeping a full 1” post dampens vibration and lets you use the premium rests you already own.
- Ergonomic Headstock Casting: Quick-flip spindle lock lever and an easy-access door for belt changes without bruised knuckles.
2. Upgraded Hardened Tool Rest
Standard factory rests are often soft iron that dings easily. The 2014B comes stock with a comfortable, profiled rest capped with a welded, hardened steel rod (similar to aftermarket Robust rests). Smooth out the painted finish with a little 400-grit sandpaper for an effortless tool glide.
3. Magnetic, Sealed Remote Control Box
Wood dust ruins shop electronics. The magnetic control box features rubber-gasketed forward/reverse and on/off switches with a sealed dial speed control. Because it sticks anywhere on the steel casting or stand, you can keep the emergency stop right under your hand whether turning long spindles or working outboard bowls.
4. Whisper-Quiet Running
Even spun up to 3,000+ RPM, the motor and drive belt produce almost no mechanical whine. You can carry on a normal conversation next to the machine without raising your voice.
Optional Upgrades: LED Lamp & Bed Extension
-
LED Work Lamp: Replaces the need for clamp-on work lights. It bolts directly to a dedicated cast mounting pad behind the headstock. It features three indexed friction joints, a swiveling 12” light bar, and a sealed front shield that withstands wet bowl turnings.

-
13” Bed Extension: Serves two roles. Mounted directly to the bedways, it increases spindle capacity between centers. Mounted low on the stand legs, it acts as an outboard turning rig paired with the included tool rest riser, opening up turning diameters up to 29”.

Pro-Tip for Bed Extensions: When bolting the extension to the upper bedways, snug the four bolts, slide the tailstock halfway across the joint seam, and lock the tailstock clamp down firmly. This automatically pulls both ground surfaces into dead-flat alignment before you torque down the mounting bolts.

Real-World Performance & Turning Test
Specs look great on paper, but how does a 1HP motor handle real shop strain?
Heavy Roughing on 10” Dry Sycamore
Using an unyielding, kiln-dry 10-inch block of sycamore, Mike ran aggressive roughing cuts with a 5/8” bowl gouge (Irish grind, 60° bevel) at roughly 810 RPM:
- When taking heavy clearing cuts, the motor dipped slightly in tone but held spindle RPM remarkably well.
- Pushing an aggressive feed rate with the full 5/8” wing buried forced the drive belt to slip slightly—acting as a natural mechanical fuse rather than stalling out the motor motor-electronics.
- The wide stand kept floor chatter to a bare minimum despite the out-of-round blank.

18” Outboard Platter Test
Moving the headstock back and swinging an 18-inch walnut platter outboard tested the limits of lathe stability:
- Even with a slightly warped, out-of-true blank running at 600 RPM, the machine stayed firmly planted without walking across the floor.
- Turning outboard lets you stand directly in front of the bowl’s interior hollow rather than bending awkwardly over bedways—saving your lower back during long sessions.
- For turning blanks beyond 18” start-to-finish, adding a couple of sandbags over the stand crossbar provides great insurance against vibration.

The Verdict
If your daily work involves turning 20” nested green tree trunks, you still need a full-weight 220V production lathe like the Powermatic 3520C.
However, if you’re turning pens, ornaments, lidded boxes, spindles, and everyday bowls up to 14”, with the occasional large platter thrown in, the Powermatic 2014B delivers full-size premium fit, finish, and stability on standard garage power.
Have questions about fitting the 2014B into your shop setup or choosing turning accessories? Contact the Craft Supplies USA team or explore our site for full specs, tooling, and accessories.

Featured posts