


Stabilizing Wood Blanks at Home
A lot of wood blanks are too soft or spalted to turn without blowing apart. Luckily there is a solution! Stabilizing is a process that uses pressure to force a resin deep into the cells of a blank, then uses heat to cure the resin. The result is a resin/wood hybrid that looks just like the original wood, but turns and finishes like a hardwood.
Stabilizing is a simple 4-step process
- Select a blank and verify that it’s dry
- Submerge the blanks in resin under vacuum
- Release the vacuum and let the blanks soak
- Bake the blanks to cure the resin
Step 1 – Selecting the Right Blanks

Select soft blanks that aren’t too dense. Avoid woods like Cocobolo and Blackwood. Species such as Maple, Buckeye Burl, Box Elder Burl, Koa, and Walnut are great candidates for stabilization. Most spalted woods are great too.
If you’re unsure of a blank you’ve got, try stabilizing a small piece before committing to an entire batch.
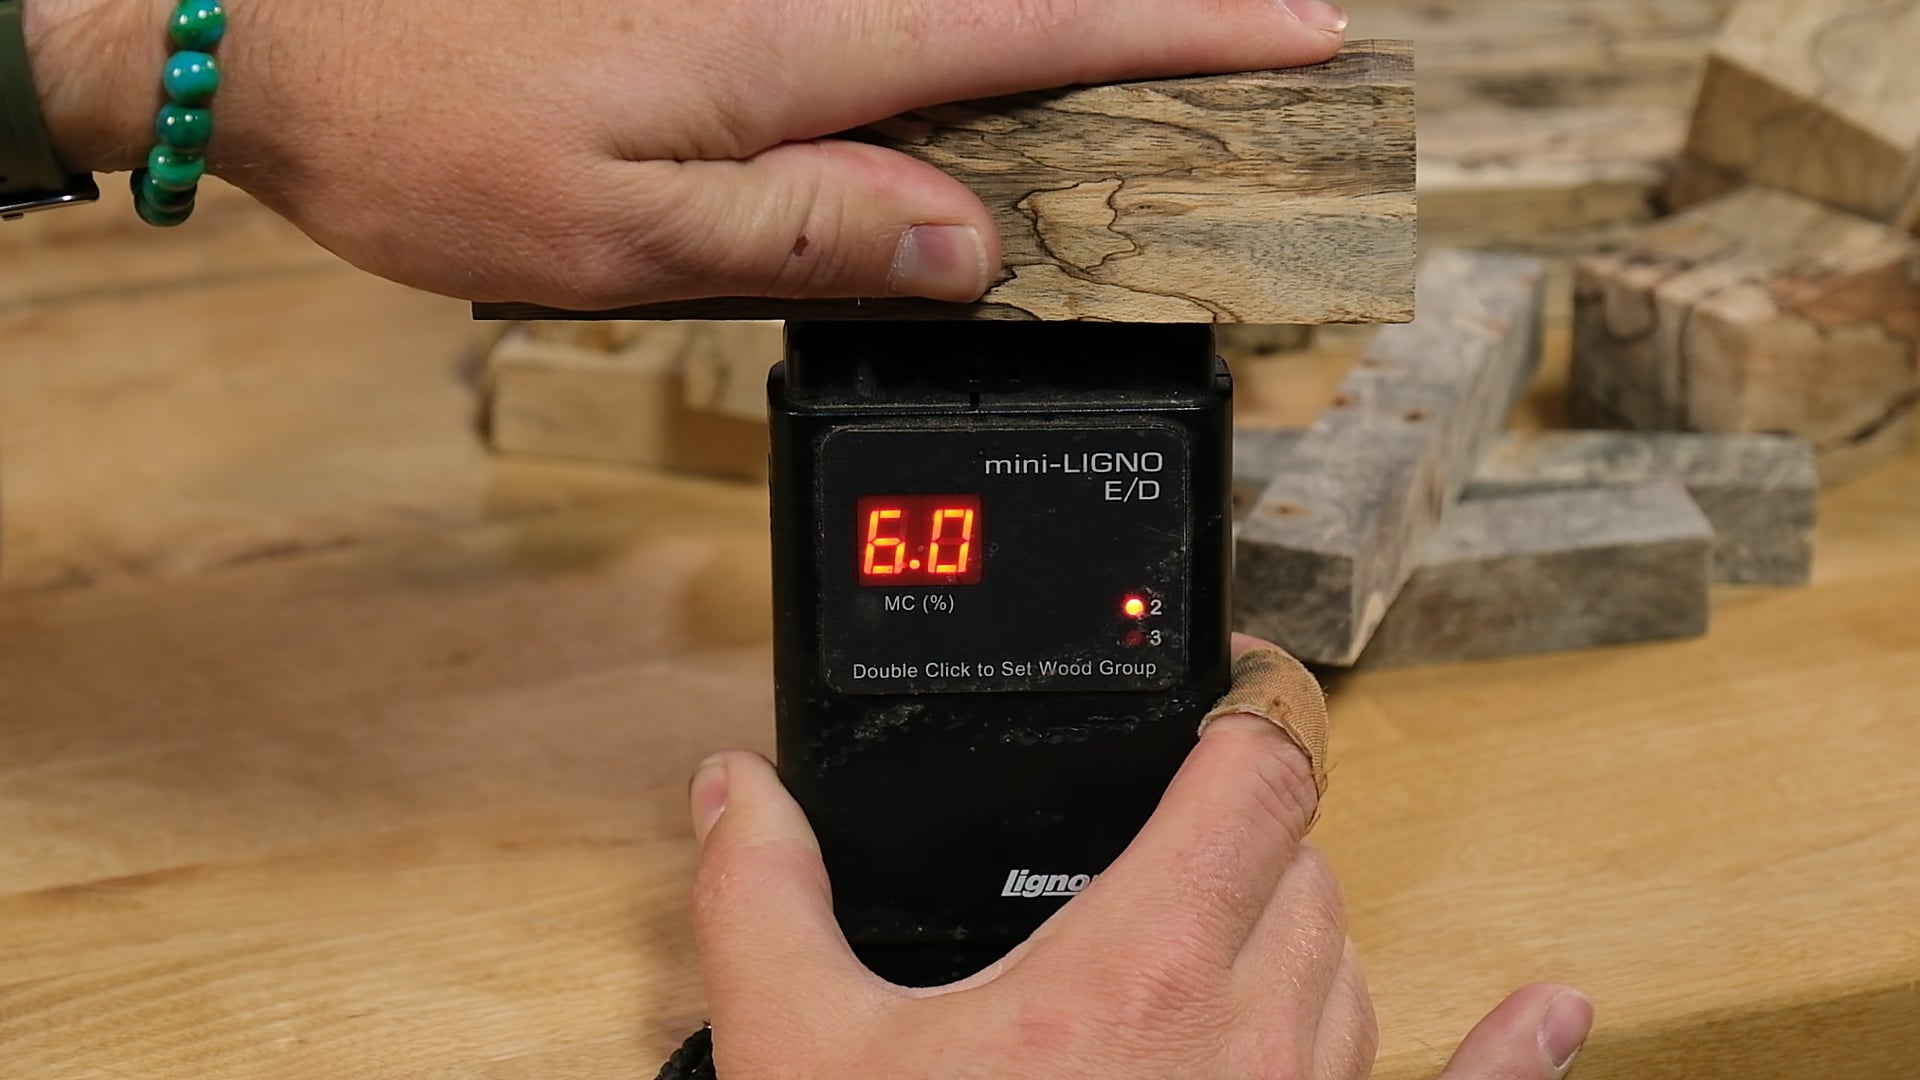
Once you’ve got your blanks, it is essential that you verify that they are dry. This is best done with a moisture meter. We use the Lingomat Mini Meter. The moisture content must be 6% or less. This moisture meter won’t measure lower than 6%, so when it shows as 6.0 then you are good to go.
Attempting to stabilize wet blanks is a bad idea. The vacuum will force any moisture from the blanks – which is then aerosolized and escapes from the pressure pot. Your vacuum, which is near the pot, will pull the moisture inside as it’s running. The moisture will cause rust to form and can potentially ruin the pump. Even one batch of wet blanks can ruin your expensive pump. Always take the time to dry your blanks completely before stabilizing.
If you have blanks that are too wet, you can dry them at home. One of the items necessary to stabilize is an oven, which can be used to easily dry your wet blanks.
We HIGHLY recommend a dedicated toaster oven just for stabilizing. That way you can stabilize outside or in your garage, keeping any fumes out of the house and off your food. We have always had luck picking them up really cheap at second-hand stores.
To kiln dry a blank, place them in your toaster oven with the temp between 150° – 170° F. Don’t set it higher or you run the risk of starting a fire. We’ve found the built-in thermometers of toaster ovens are particularly preside, so use an oven thermometer you can place inside. Check the blanks regularly until they reach the desired 6% or less moisture content.
Set up Your Equipment
Stabilizing requires specific supplies – including a pressure pot, pump, and connecting hoses. Here is a link to supplies on our website
Now that your blank is dry and your equipment is set up your equipment. It’s a good idea to check your system and make sure you don’t have any leaks and that you’re pulling full vacuum.
A word about vacuum strength and mercury levels. Your elevation determines how much you can pull. At sea level, your system should be pulling around 29.5″ of mercury – check the gauge on your system. As a general rule, you’ll lose 1″ of mercury for every 1,000 feet you gain in elevation. Here at our shop, we are around 4,500 feet about sea level, so we hit max vacuum around 23-24 inches on the gauge.

When selecting your resin, make sure you are using wood stabilizing resin. Do no use Polycryl, Pentacryl, or WinMax Wood Hardener. Using those products will ruin your pump and may catch it on fire.
Cactus Juice resin requires a catalyzing agent that must be added before use. BVV resin comes pre-catalyzed. Both work great in any stabilizing system.

Step 2 – Submerge Blanks in Resin Under Vacuum
Stabilizing resin is expensive. To use less resin, I place my blanks in a smaller bucket and then put the bucket in the pot. Blanks can be placed on top of each other – it doesn’t matter if they touch at this stage. Once you’ve got your blanks laid out, make sure you place something heavy on top to keep them from floating. I use a faceplate. Whatever you use, just make sure isn’t soft or it’ll soak up resin.

Pour enough resin to completely cover the blanks. We recommend at least an inch over the top of the blanks (don’t worry, any unused resin can be used on your next batch).

Open the bleed valve open and turn on your pump. Then place the lid on and make sure it seats properly. Slowly close the valve to increase the vacuum. You’ll see bubbles as the air is pulled from the wood.

Don’t close the valve all at once or the resin will foam up and spill out of the bucket.

Check your gauge and make sure you are pulling full vacuum at your elevation. Then let the pump run for several hours. Check on it from time to time and watch until all, or nearly all, of the bubbles have stopped flowing from the blanks.
Step 3 – Let the Blanks Soak Overnight
Release the valve and then turn off the pump. As you do, you can see the level of resin drop as the resin is forced into the blanks. This is caused by atmosphere (air) rushing back into the chamber. It’s a good idea to add a little more resin just to make sure the blanks don’t get exposed to dry air.
Then let them soak in the resin overnight.

If you want to check that you ran your pump long enough, remove the ballast and see if your blanks float. If they float, you need to run the pump longer.
Step 4 – Cure the Blanks by Baking Them
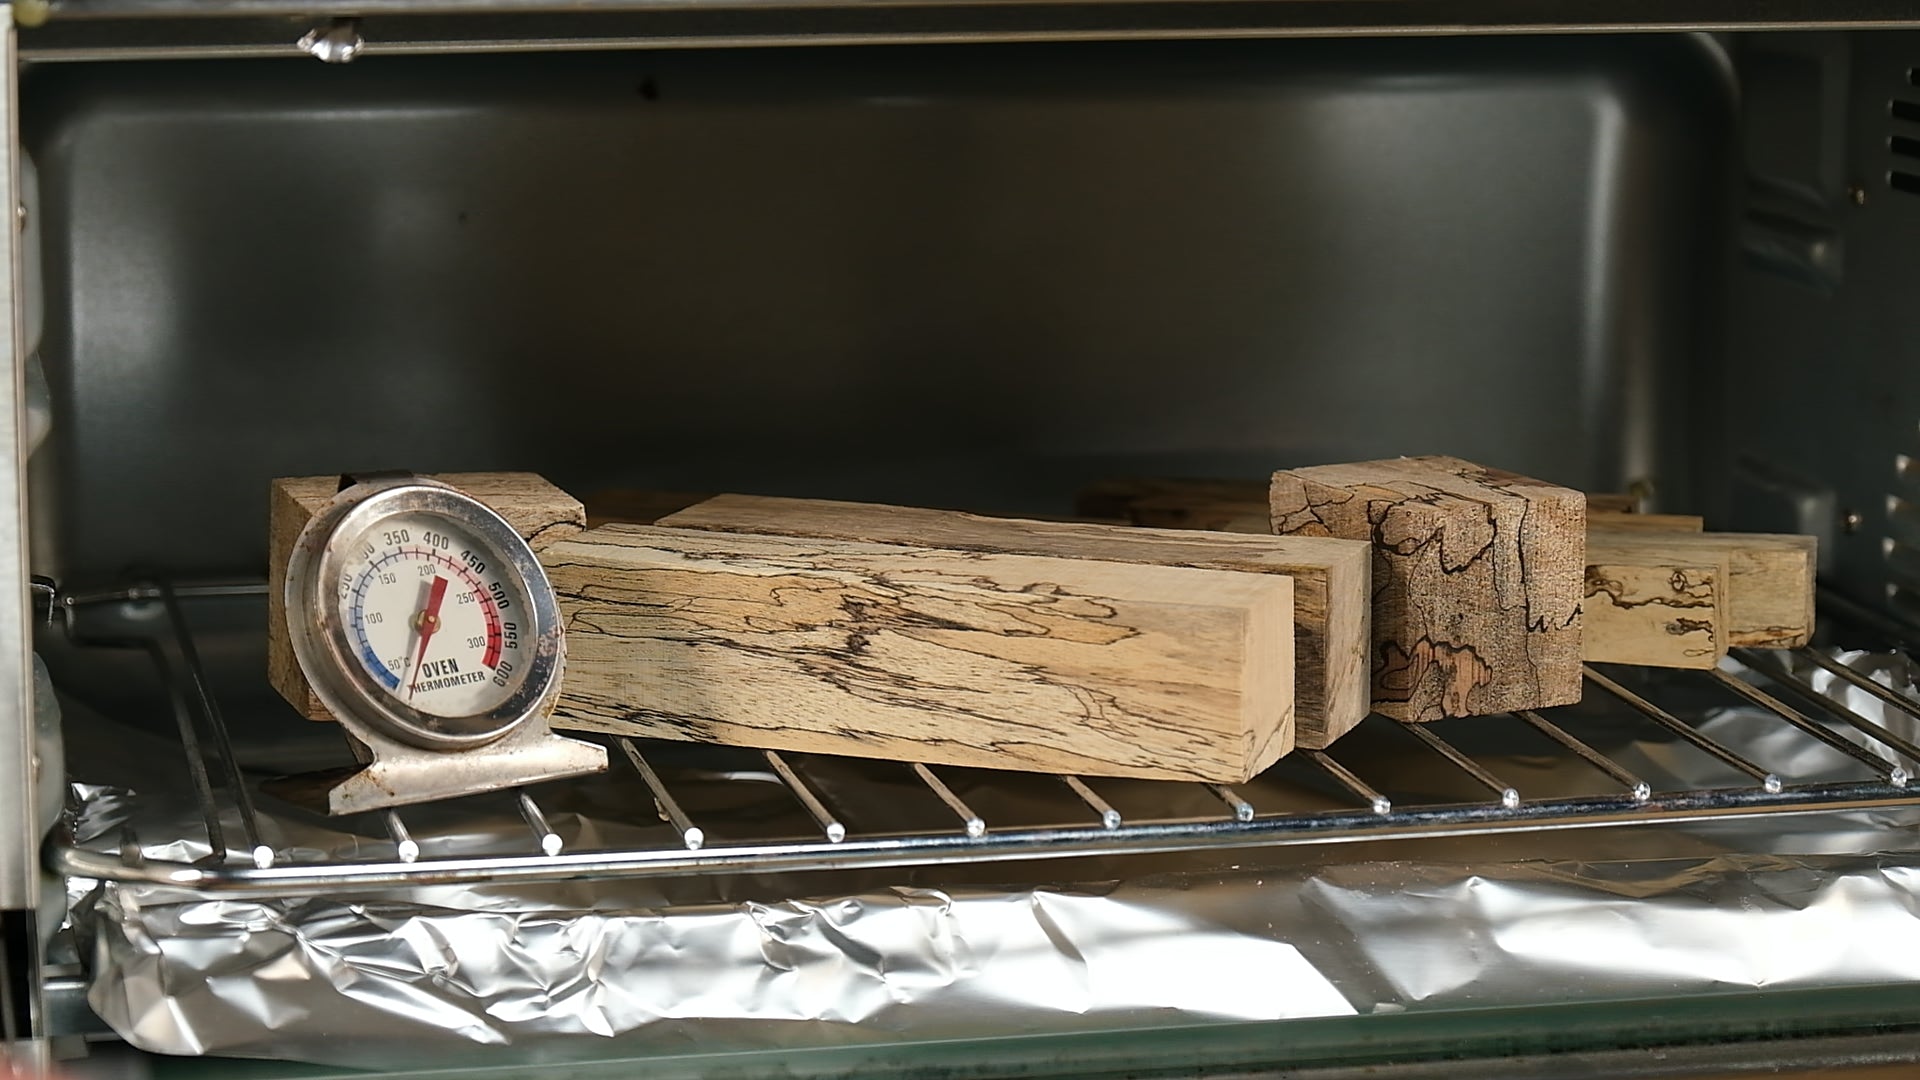
Preheat your oven to 220°. Use a separate thermometer to verify the temperature.
Remove the blanks and wipe off excess resin. Lay them out on a wire rack, ensuring that they are not touching. If the blanks do touch, they’ll cure together and require a saw to cut them apart.

Pour the unused resin back into the original container for use on your next project.

Place your blanks in the oven at 220° for 2 hours. This process will put off some fumes, so we recommend placing your toaster oven in a well-ventilated area or outside.

Bake all blanks for 2 hours. No need to increase time for a larger number of blanks or extra large blanks. After 2 hours remove them from the oven and let them cool.
Turning a Stabilized Blank
Stabilized blanks turn and finish just like exotic hardwoods. You can use your standard turning tools and sanding supplies when turning.

When it comes to finishing – use your favorite finishing supplies and techniques.


Featured posts


